What is Swagger?
According to Swagger.io, it is basically an open-source software framework with a large ecosystem of tooling that helps developers design, build, document, and consume RESTful web services. For more reading on Swagger check out there Tools Documentation.
Let’s build a WEB API for this demo
In order for me to be able to show how to add swagger, I will need to implement a simple WEB API in ASP.NET Core. If you would like to follow along, here’s a link to the demo project on GitHub
In this post, you learn how to:
- Create a web API project.
- Add a model class and a database context.
- Scaffold a controller with CRUD methods.
- Add Swagger
Prerequisites
- Visual Studio 2019
- .Net Core 3
Create Web API Project
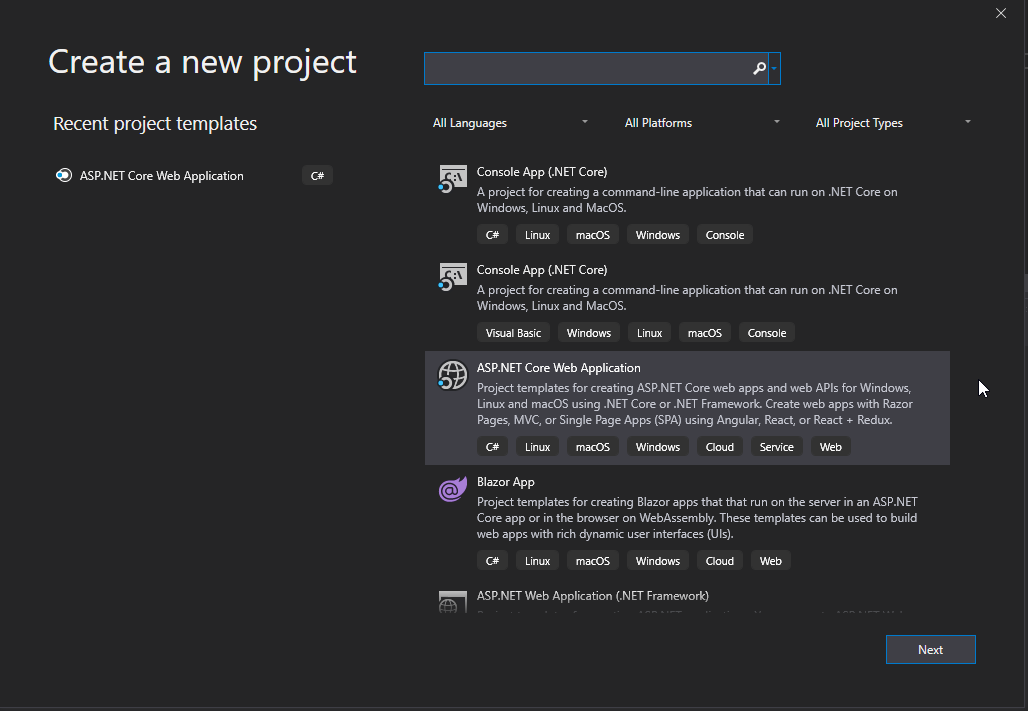
From the File menu, select New > Project.
Select the ASP.NET Core Web Application template and click Next.
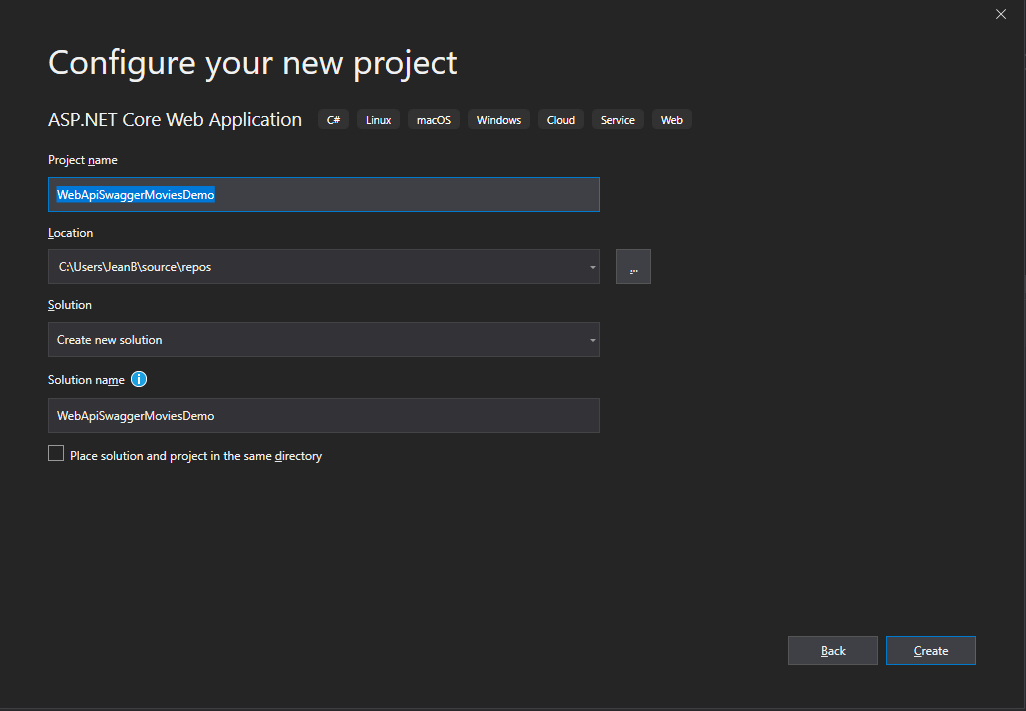
Give the project a name or if you would like to follow along, name the project WebApiSwaggerMoviesDemo and click Create.
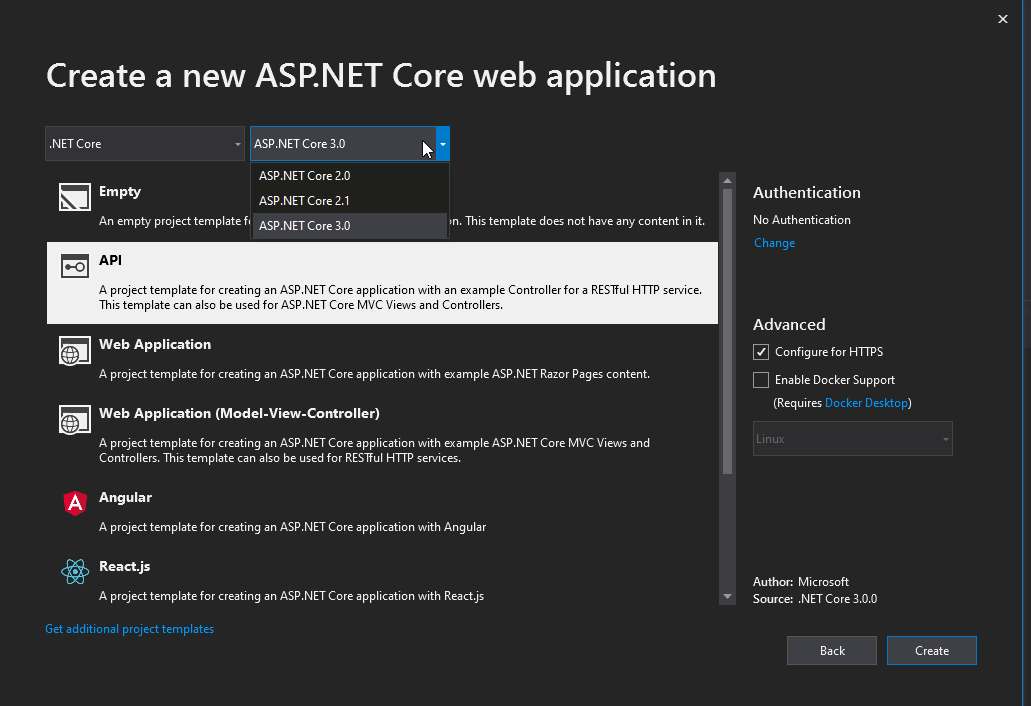
In the Create a new ASP.NET Core Web Application dialog, confirm that .NET Core and ASP.NET Core 3.0 are selected. Select the API template and click Create.
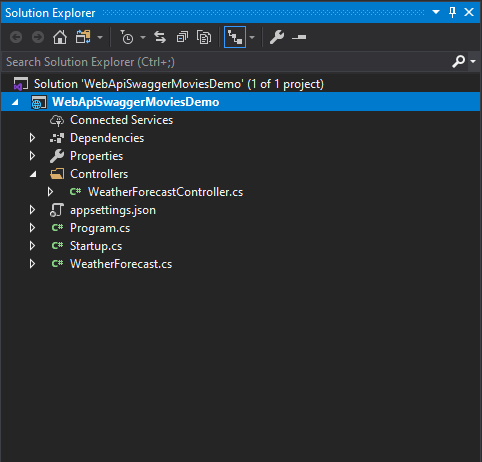
By default a new API called “WeatherForecast” is created for you.
Test the WeatherForecast API
Before I add to this project, I wanted to test it first to make sure everything is good to go. As, you can see I get a list of temperatures below in JSON format.

Add New Movie API
Now that I know the application is working as expected. I need to add a new Model folder to house the movie model.
In Solution Explorer, right-click the project. Select Add > New Folder. Name the folder Models.
Right-click the Models folder and select Add > Class. Name the class Movie and select Add. Therefore, a new file called Movie.cs is added in the Models folder.
Replace the template code with the following code:
using System;

namespace WebApiSwaggerMoviesDemo.Models
{
    public class Movie
    {
        public string Name { get; set; }
        public string Description { get; set; }
        public string Classification { get; set; }
        public DateTime? ReleaseDate { get; set; }
    }
}
Configure the DB Context
Right-click the Models folder and select Add > Class. Name the class MovieContext and click Add. Then, make sure to replace the content of the file with the following piece of code.
using Microsoft.EntityFrameworkCore;

namespace WebApiSwaggerMoviesDemo.Models
{
    public class MovieContext: DbContext
    {
        public MovieContext(DbContextOptions options)
             : base(options)
        {

        }
        public DbSet Movies { get; set; }
    }
}
While developing this demo, I did not have Microsoft.EntityFrameworkCore installed, so I had to get it install via NuGet Package Manager.
Register the DBContext
As you already know ASP.NET Core is designed from the start to support Dependency Injection, therefore I need to register the Database context with the IOC container. Something to note here is that I am also specifying to use In-memory database. The name is also specified.
Replace startup.cs file with the following code below.
using Microsoft.AspNetCore.Builder;
using Microsoft.AspNetCore.Hosting;
using Microsoft.Extensions.Configuration;
using Microsoft.Extensions.DependencyInjection;
using Microsoft.Extensions.Hosting;
using WebApiSwaggerMoviesDemo.Models;
using Microsoft.EntityFrameworkCore;

namespace WebApiSwaggerMoviesDemo
{
    public class Startup
    {
        public Startup(IConfiguration configuration)
        {
            Configuration = configuration;
        }

        public IConfiguration Configuration { get; }

        // This method gets called by the runtime. Use this method to add services to the container.
        public void ConfigureServices(IServiceCollection services)
        {

            services.AddDbContext(opt =>
            {
                opt.UseInMemoryDatabase("MovieList");
            });

            services.AddControllers();
        }

        // This method gets called by the runtime. Use this method to configure the HTTP request pipeline.
        public void Configure(IApplicationBuilder app, IWebHostEnvironment env)
        {
            if (env.IsDevelopment())
            {
                app.UseDeveloperExceptionPage();
            }

            app.UseHttpsRedirection();

            app.UseRouting();

            app.UseAuthorization();

            app.UseEndpoints(endpoints =>
            {
                endpoints.MapControllers();
            });

        }
    }
}
Add Movies Controller
In order to add the movie controller, I used the scaffold feature as followed.
Right-click the Controllers folder.
Select Add > New Scaffolded Item.
Select API Controller with actions, using Entity Framework, and then select Add.
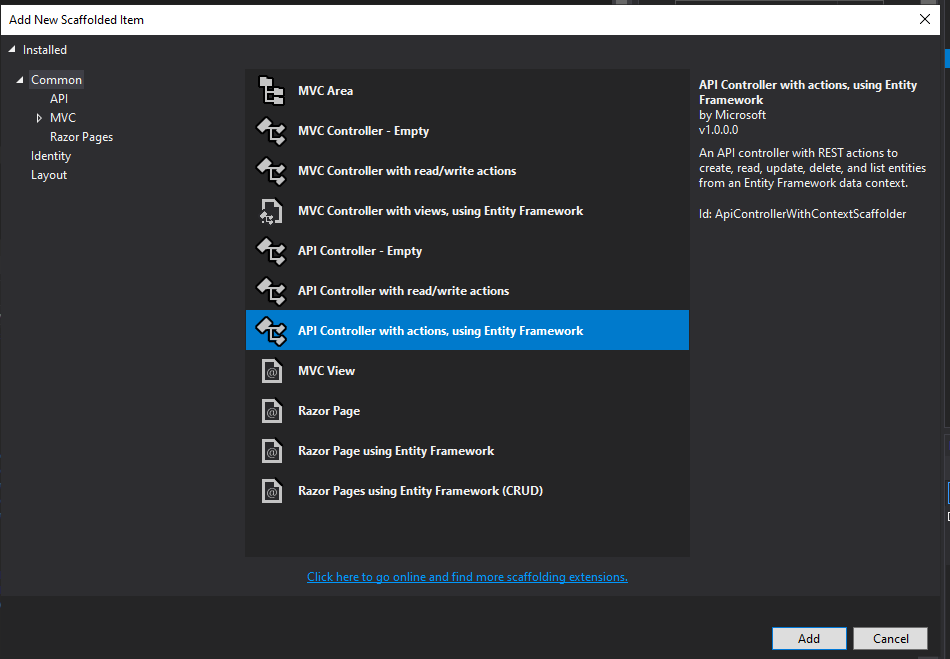
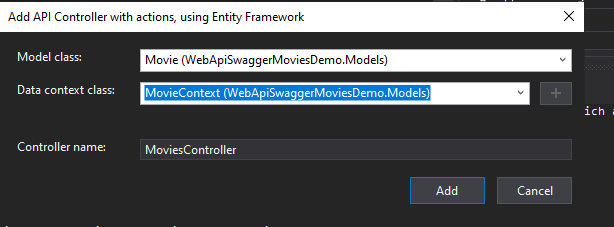
In the Add API Controller with actions, using Entity Framework dialog:
Pick Movie (WebApiSwaggerMoviesDemo.Models) in the Model class.
Next,select MovieContext (WebApiSwaggerMoviesDemo.Models) in the Data context class.
Then, click Add.
Install Swagger
I have everything I need in the Web API. It’s time to install Swagger. So, I will use NuGet Package Manager to add SwashBuckle
Install-Package Swashbuckle.AspNetCore -Version 5.0.0-rc4
Once the package has been installed, navigate to the project folder and then open startup.cs and then add the middleware as you see in the below file.
       public void ConfigureServices(IServiceCollection services)
        {
            services.AddDbContext(opt =>
            {
                opt.UseInMemoryDatabase("MovieList");
            });
            services.AddControllers();

            services.AddSwaggerGen(c =>
            {
               c.SwaggerDoc("v1", new OpenApiInfo { Title = "Swagger Movies Demo", Version = "v1" });
            });

        }
And last, you’ll need to enable Swagger and Swagger UI by updating the configure method as followed.
       public void Configure(IApplicationBuilder app, IWebHostEnvironment env)
        {
            if (env.IsDevelopment())
            {
                app.UseDeveloperExceptionPage();
            }

            app.UseHttpsRedirection();

            app.UseRouting();

            app.UseAuthorization();
            app.UseSwagger();

            app.UseSwaggerUI(c =>
            {
                c.SwaggerEndpoint("/swagger/v1/swagger.json", "Swagger Movies Demo V1");
            });

            app.UseEndpoints(endpoints =>
            {
                endpoints.MapControllers();
            });

        }
Start a new debugging session (F5) and navigate to this url http://localhost:[PORT_NUMBER]/swagger. Then, you should see Swagger UI help pages for your APIs.

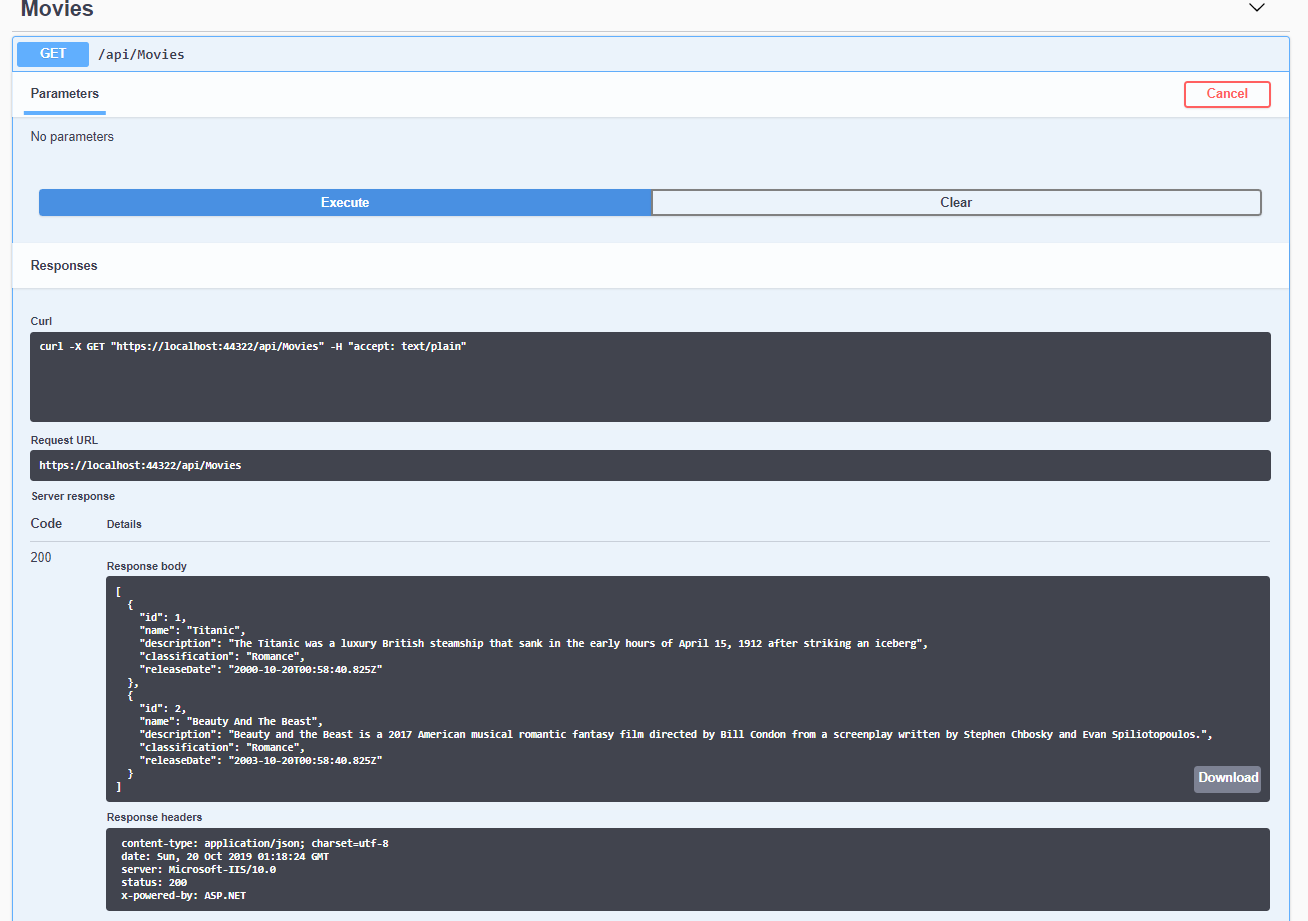
All in all, let’s add a few movies to test the API. Expand the post ribbon.
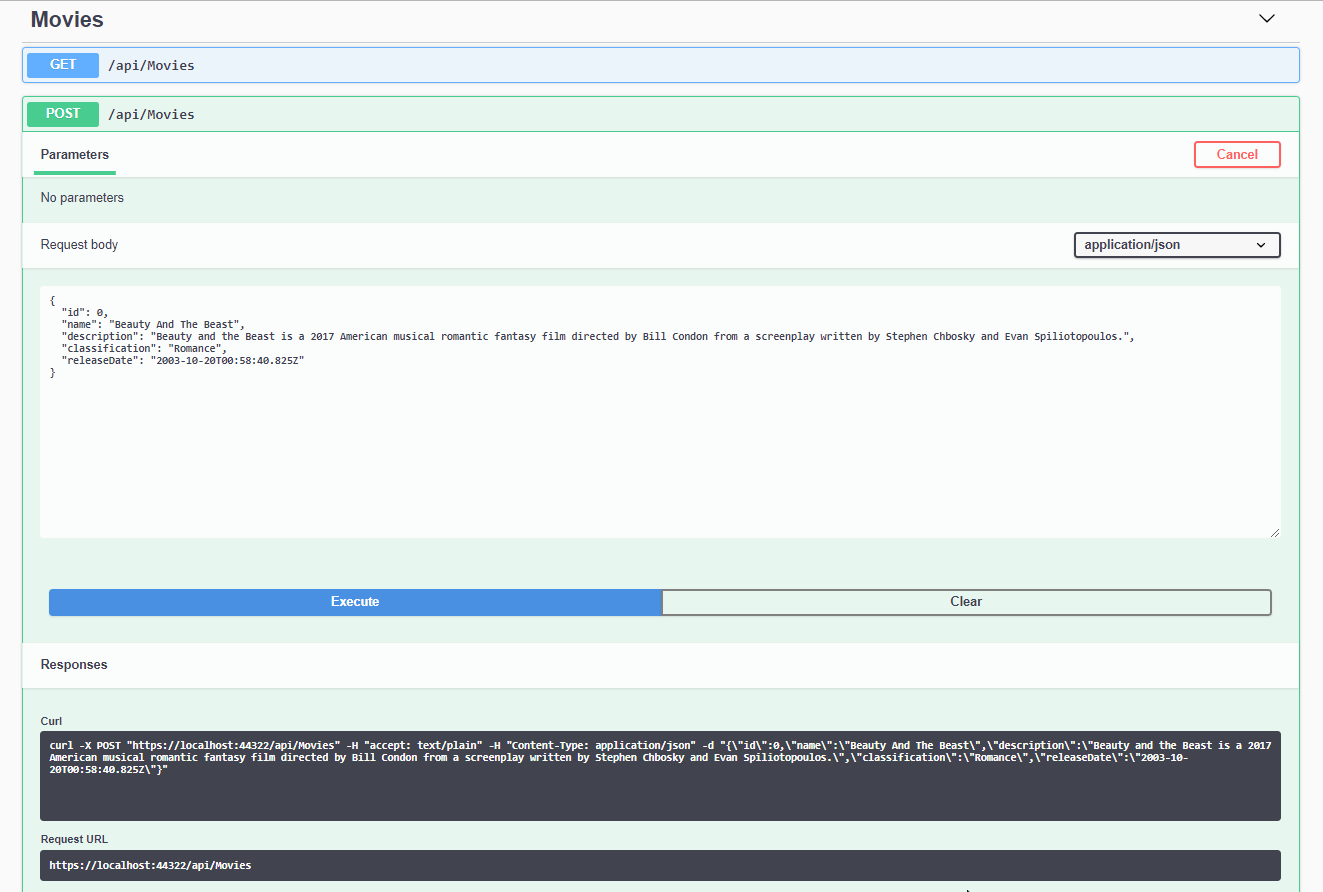
After adding a few movies, let use the GET to pull all the movies.