I remember a few months back I wrote a quick post on how I managed to send email using MailKit in one of the projects I was on. Well, as you know there are many different services out there making thing simple to send e-mails from application. Since, I like to test things out first before actually implementing it in a real application, I decided to give Sendgrid a try. Therefore, in this post I will walk you through the steps I took to send emails using the Sendgrid API. Are you ready? Let’s do it!!! Find demo project on GitHub here.
I need to create a brand new application for this post. I am currently using Visual Studio 2019 for this project but feel free to use any other version you may have.
Project Setup
- First, create a new ASP.NET Core application with the following name “SendgridEmailInAspNetCore”
“File” –> “New” –> “Project”
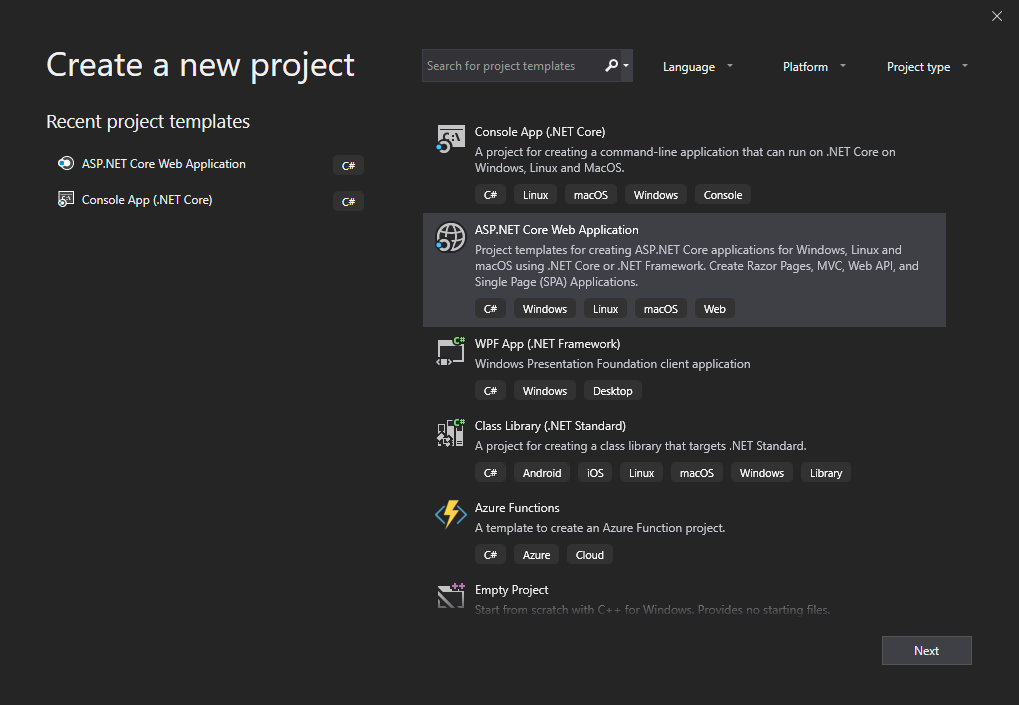
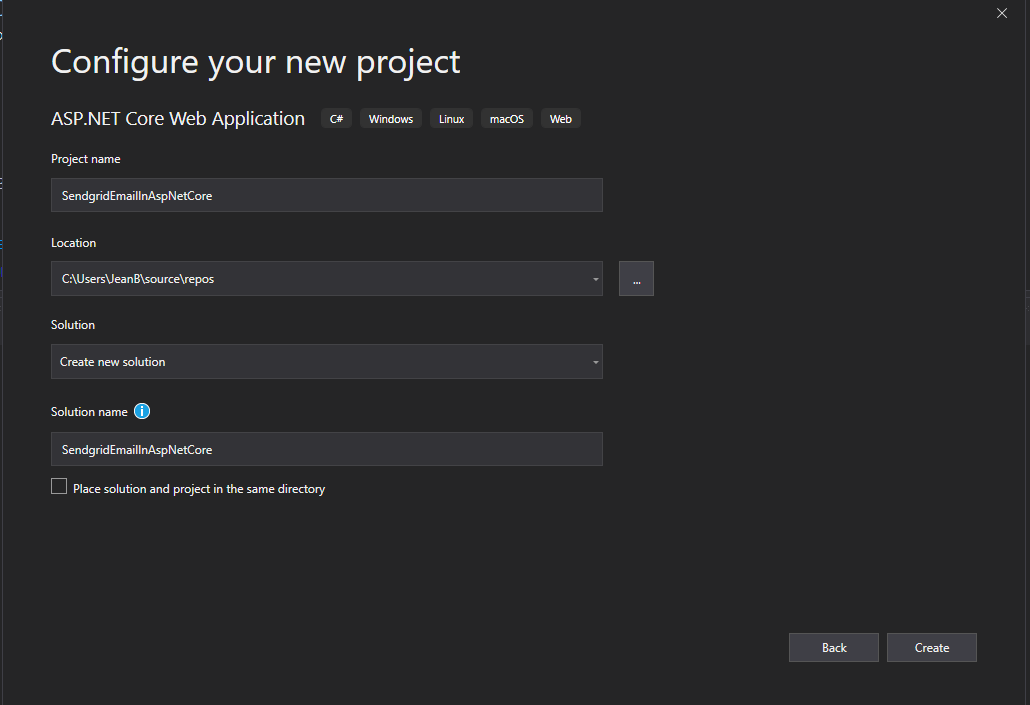
- A “New Project” dialog will open where you can configure your project such as giving a name and location.
- Make sure the project build properly.
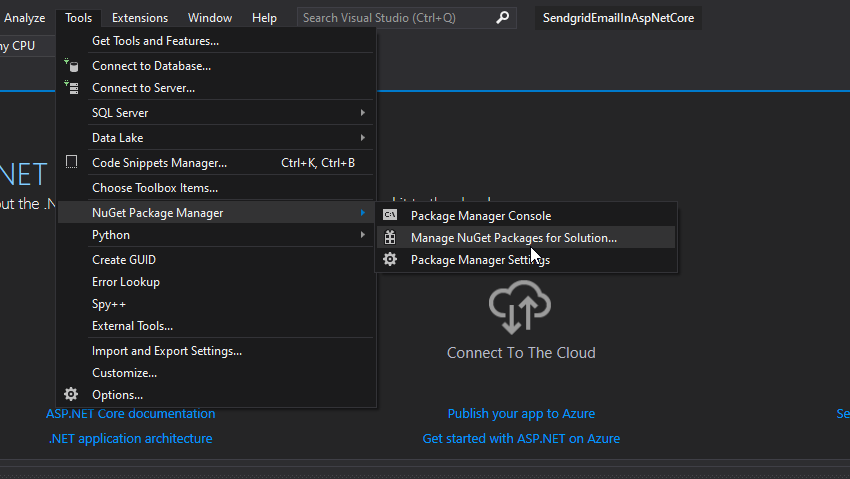
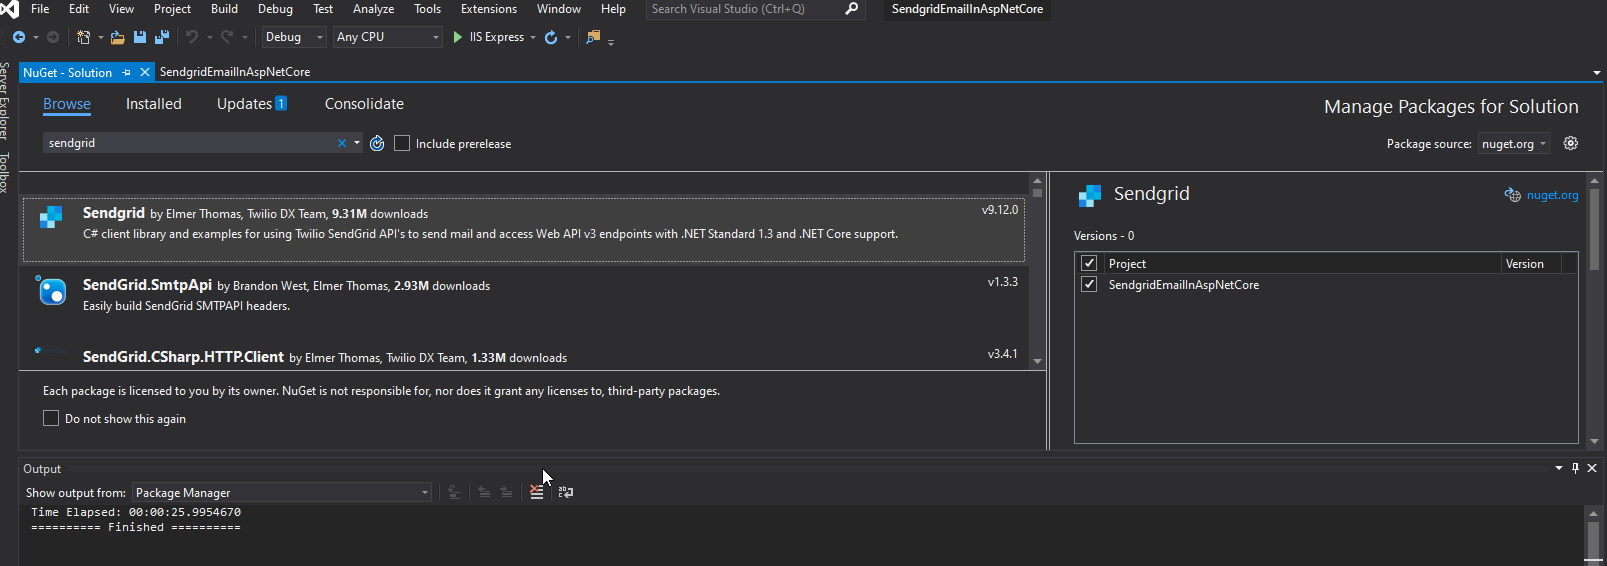
Now that we have the project setup we need to add the Sendgrid Package using the NuGet Package manager tool.
Add services folder
- Let’s add a new folder to the project and called it “Services”. This folder will contain the interface that will be used to send the e-mail.
- Next we need to add the interface called “IEmailSender.cs”
    using System.Collections.Generic;
    using System.Threading.Tasks;

     namespace SendgridEmailInAspNetCore.Services
     {
       public interface IEmailSender
       {
          Task SendEmailAsync(List<string> emails, string subject, string message);
       }
     }
- Add an Implementation class called “EmailSender.cs.
using Microsoft.Extensions.Options;
using SendGrid;
using SendGrid.Helpers.Mail;
using System;
using System.Collections.Generic;
using System.Threading.Tasks;

namespace SendgridEmailInAspNetCore.Services
{
    public class EmailSender:IEmailSender
    {
        public EmailSender(IOptions<EmailAuthOptions> optionsAccessor)
        {
            Options = optionsAccessor.Value;
        }

        public EmailAuthOptions Options { get; } //set only via Secret Manager

        public Task SendEmailAsync(List<string> emails, string subject, string message)
        {

            return Execute(Environment.GetEnvironmentVariable("SENDEMAILDEMO_ENVIRONMENT_SENDGRID_KEY"), subject, message, emails);
        }

        public Task Execute(string apiKey, string subject, string message, List<string> emails)
        {
            var client = new SendGridClient(apiKey);
            var msg = new SendGridMessage()
            {
                From = new EmailAddress("noreply@domain.com", "Bekenty Jean Baptiste"),
                Subject = subject,
                PlainTextContent = message,
                HtmlContent = message
            };

            foreach (var email in emails)
            {
                msg.AddTo(new EmailAddress(email));
            }

            Task response = client.SendEmailAsync(msg);
            return response;
        }
    }
}
-
Next, we’ll add a new class in that same services folder called “EmailAuthOptions.cs” This will only contain the email secrets from sendgrid.
namespace SendgridEmailInAspNetCore.Services
{
    public class EmailAuthOptions
    {
        public string SendGridUser { get; set; }
        public string SendGridKey { get; set; }
    }
}
Register the services
-
Find the Startup.cs file, and the ConfigureServices method. Then, add the following two lines.
        services.Configure(Configuration);
        services.AddTransient<IEmailSender, EmailSender>();
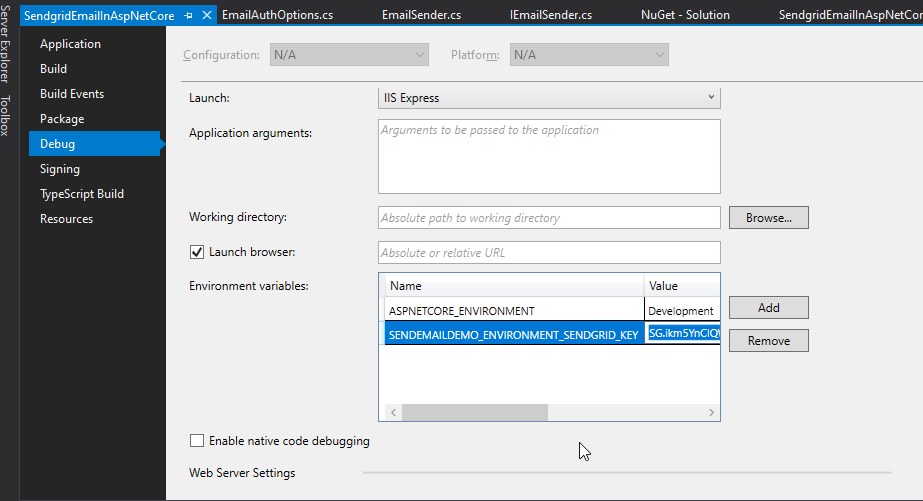
Setup the Environment Variable
- Right click on the project and go to the properties. Then, click the debug tab and add a new environment variable with the following key “SENDEMAILDEMO_ENVIRONMENT_SENDGRID_KEY”. set the value to what you have gotten from Sendgrid.
Build E-mail Interace to capture message from user
- Let’s add a new model called “EmailModel.cs” with the following properties.
using System.ComponentModel.DataAnnotations;

namespace SendgridEmailInAspNetCore.Models
{
    public class EmailModel
    {
        [Required]
        [EmailAddress]
        public string Email { get; set; }
        [Required]
        public string Subject { get; set; }
        [Required]
        public string Message { get; set; }
    }
}
- Now, let’s add a new view called “SendEmail.cshtml” in the HOME folder with the following content.
@model SendgridEmailInAspNetCore.Models.EmailModel

@{
    ViewData["Title"] = "SendEmail";
    Layout = "~/Views/Shared/_Layout.cshtml";
}

<h2>Send Email With Sendgrid in Asp.Net Core</h2>

<hr />
<div class="row">
    <div class="col-md-4">
        <form asp-action="SendEmail">
            <div asp-validation-summary="ModelOnly" class="text-danger"></div>
            <div class="form-group">
                <label asp-for="Email" class="control-label"></label>
                <input asp-for="Email" class="form-control" />
                <span asp-validation-for="Email" class="text-danger"></span>
            </div>
            <div class="form-group">
                <label asp-for="Subject" class="control-label"></label>
                <input asp-for="Subject" class="form-control" />
                <span asp-validation-for="Subject" class="text-danger"></span>
            </div>
            <div class="form-group">
                <label asp-for="Message" class="control-label"></label>
                <textarea asp-for="Message" class="form-control" cols="100"></textarea>
                <span asp-validation-for="Message" class="text-danger"></span>
            </div>
            <div class="form-group">
                <input type="submit" value="Send" class="btn btn-default" />
            </div>
        </form>
    </div>
</div>

@section Scripts {
    @{await Html.RenderPartialAsync("_ValidationScriptsPartial");}
}
- In order to be able to send the email in the controller we’ll need to inject the email service via the constructor so that we can have access to send the emails.
start the start of the home controller we need to add the follow code snippet.private readonly IEmailSender _emailSender; public HomeController(IEmailSender emailSender) { _emailSender = emailSender; }
- Now, we’re ready to add the email action methods to the controller.
public IActionResult SendEmail()
{
  return View();
}
public async Task SendEmail(EmailModel model)
{
 if (ModelState.IsValid)
 {
   var emails = new List();
   emails.Add(model.Email);
   await _emailSender.SendEmailAsync(emails, model.Subject, model.Message);
 }
 return View(model);
}
Final Asp.net Core Email With Sendgrid
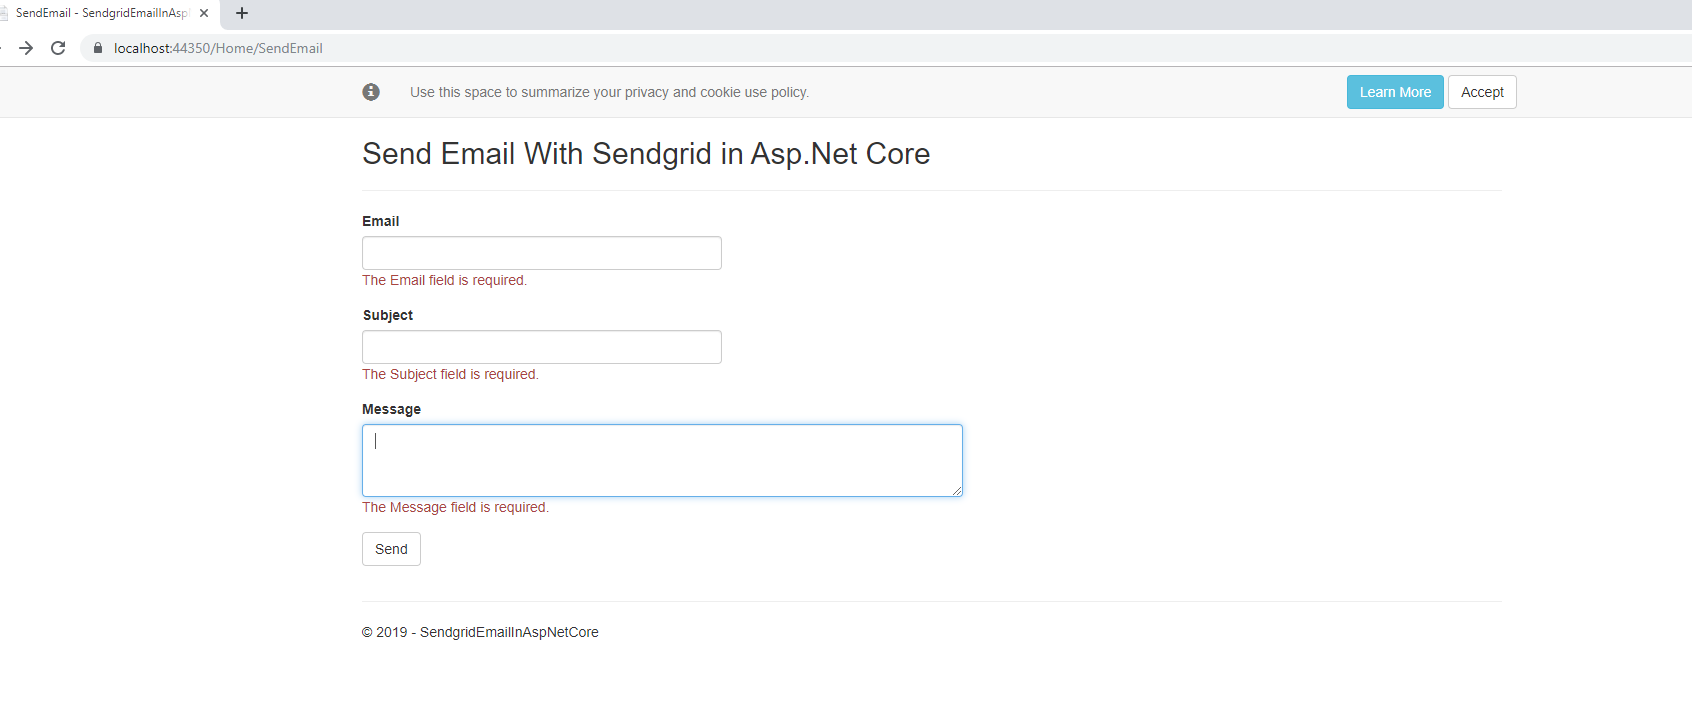
- Now that we have everything in place let’s run the application and Test it out.
Voila, the application loaded with no issues. Let’s navigate to the SendEmail page. Try to send email without entering anything, you should notice the validations.
- Now, enter a valid email, subject, and a message, then click the send button.

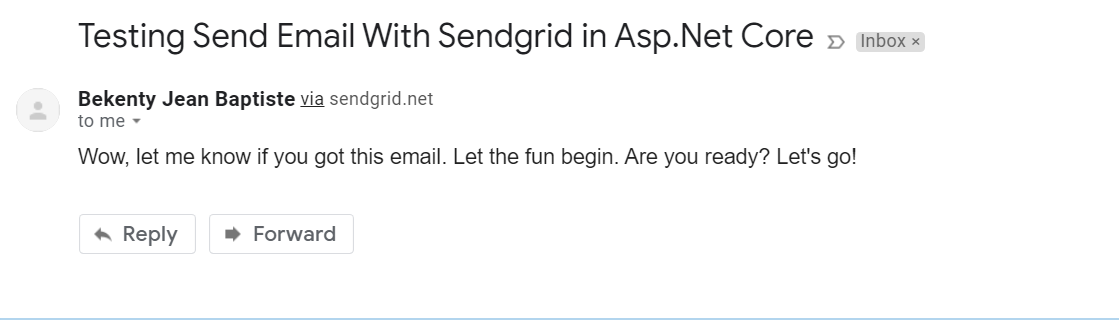
- The moment of truth. Bingo, I got the e-mail in my inbox as shown below.