Last post I’ve gone over how to disable a specific user in ASP.NET Core Identity 2.0, so in this post here, we’ll take a look at how we can leverage Entity Framework to quickly create new databases in no time. Therefore, I will be creating an employee manager using ASP.NET Core 2.1 and Entity Framework (EF) core Code First approach. This employee manager tracks all employees and their respective department.
Prerequisites
Install .NET Core 2.1 SDK from here
Install the latest version of Visual Studio 2017 from here
SQL Server 2008 or above
Source Code
Before proceeding, I recommend you get the source code from GitHub.
Quick read & Credit to: Entity Framework Core on ASP.NET Core
Create the ASP.NET Core project
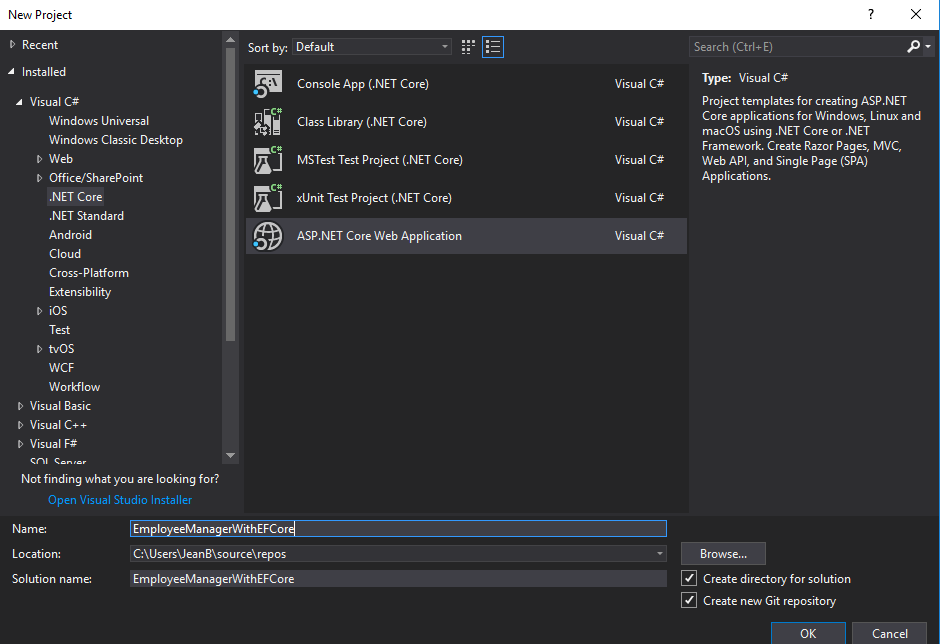
Open Visual Studio and select “File” > “New” > “Project”.
After selecting the project, a “New Project” dialog will open. Select “.NET Core” in the left panel inside the Visual C# menu.
Then, select “ASP.NET Core Web Application” from the available project types. Put the name of the project as “EmployeeManagerWithEFCore” and press “OK” to create the ASP.NET Core Project.
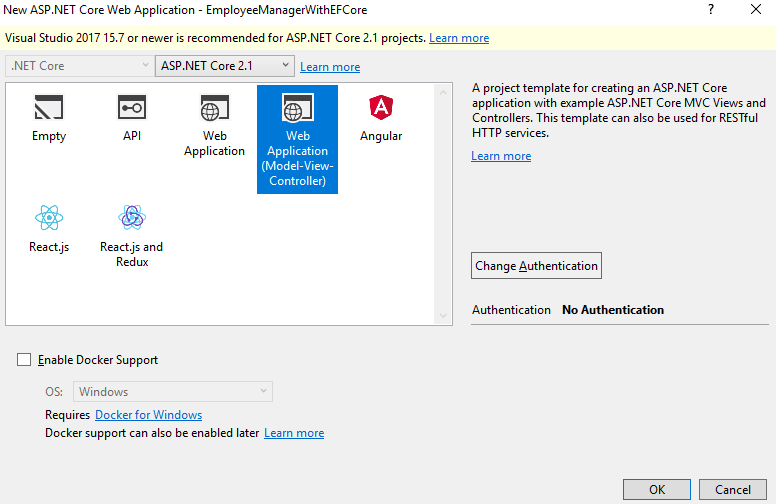
A new dialog box will open asking you to select the template to be used for the project. So, make sure to select the following:
- Make sure that .NET Core and ASP.NET Core 2.1 are selected in the drop-down lists
- Select the Web Application (Model-View-Controller) project template
- Make sure that Authentication is set to No Authentication
- Click OK
By default the “No Authentication” option will be selected, however, if you are required to add login, you can change that in the change authentication button and select Individual User Accounts . Since this tutorial is simply to show how to get started with EntityFramework Core, we’ll keep things simple and not required user to login in in order to add new employees.
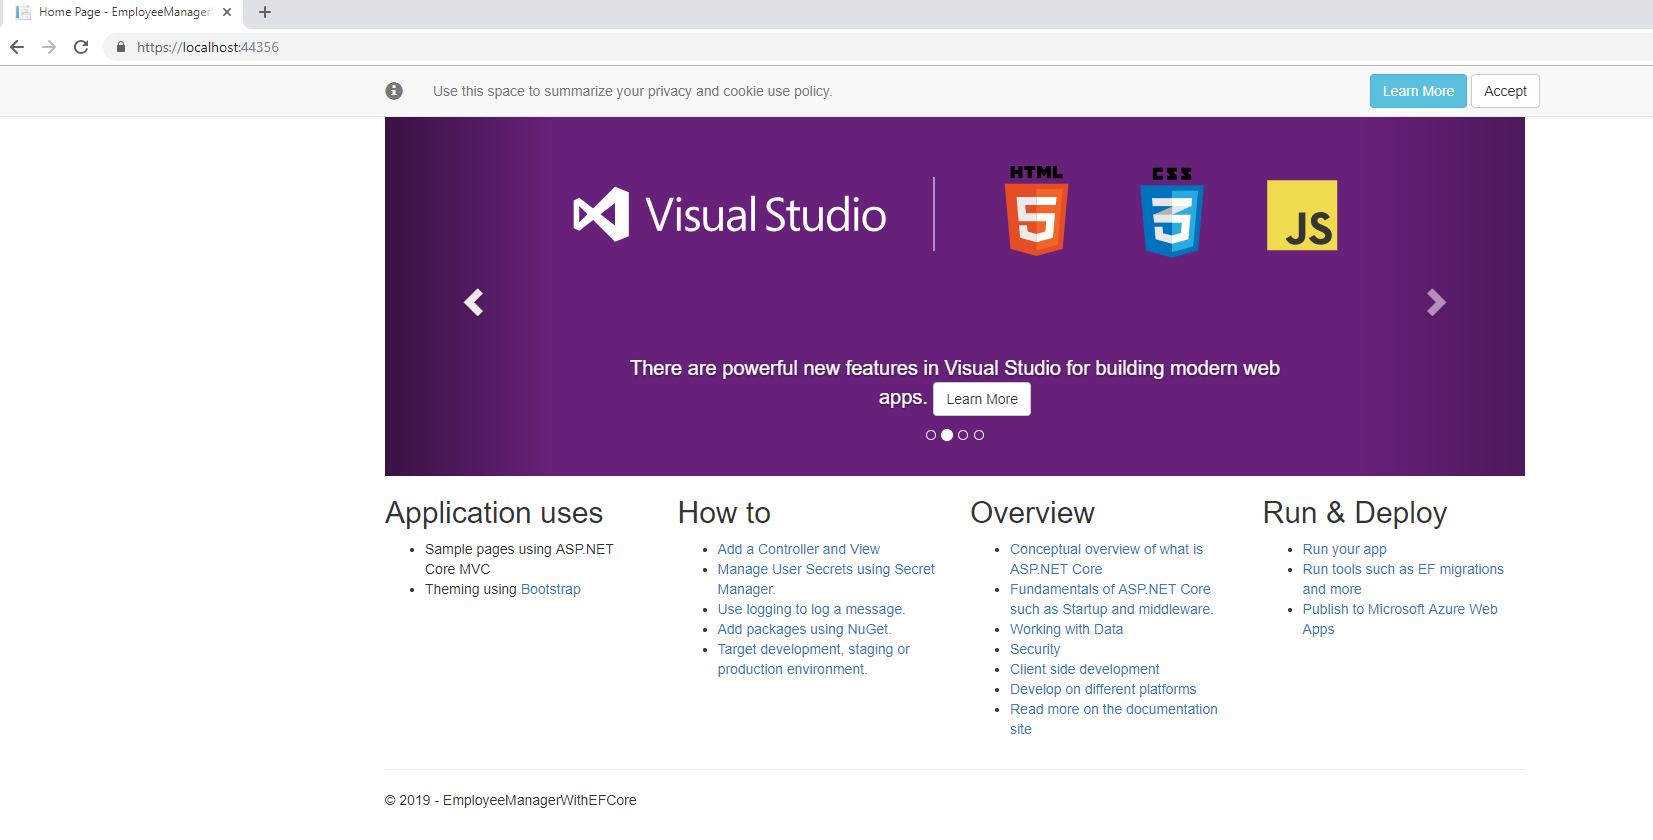
To make sure the project is created correctly, let’s run it and make sure there’s no errors before we start adding the models.
Adding the necessary Models
- Employee
- Department
Now, that we know we have a working application, let’s add the models.
Right-click on the Models folder and select Add > Class.
Enter Employee.cs as the name and click OK as seen in the image below.
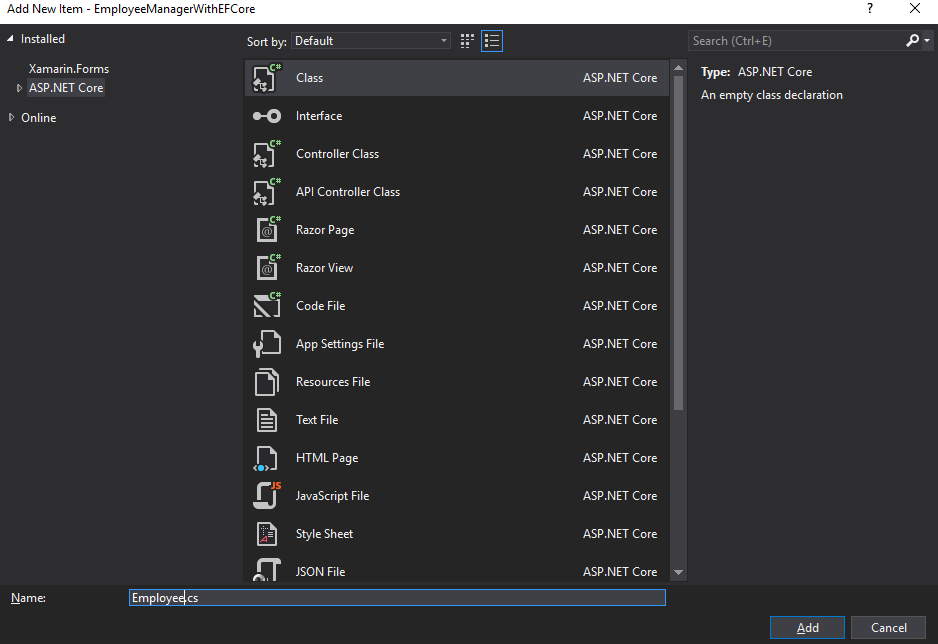
Replace the contents of the file with the following code:
using System.ComponentModel.DataAnnotations;

namespace EmployeeManagerWithEFCore.Models
{
    public class Employee
    {
        [Key]
        public int Id { get; set; }
        [Required]
        [MaxLength(60)]
        public string FirstName { get; set; }
        [MaxLength(60)]
        public string LastName { get; set; }
        [Required]
        public int Salary { get; set; }
        [Required]
        [MaxLength(20)]
        public string Title { get; set; }
    }
}
Next, right-click on the Models folder and select Add > Class.
Enter Department.cs as the name and click OK.
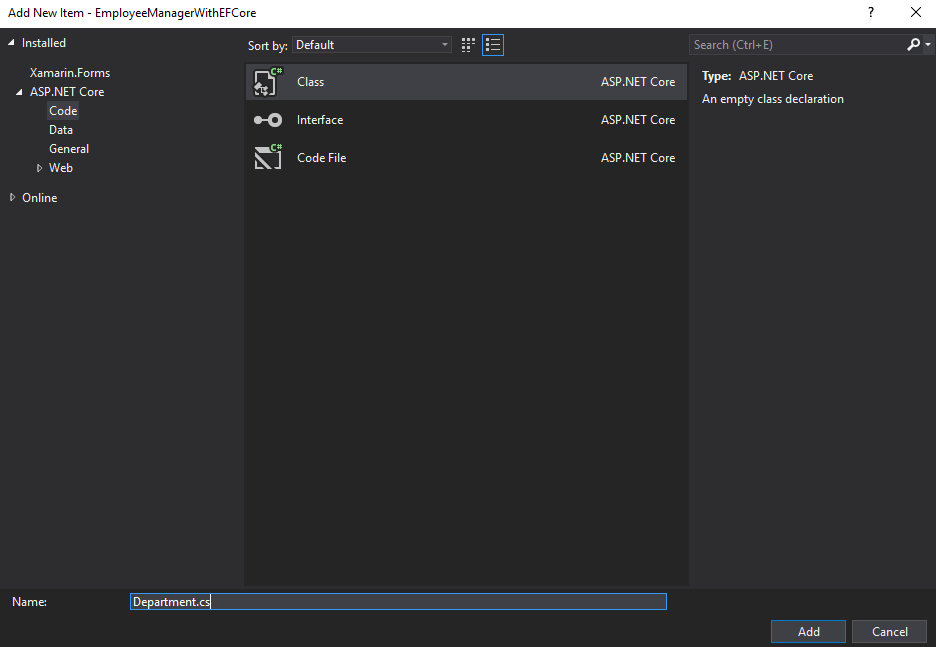
Replace the contents of the file with the following code:
using System;
using System.Collections.Generic;

namespace EmployeeManagerWithEFCore.Models
{
    public class Department
    {
        public Department()
        {
            Employees = new List();
        }
        public int Id { get; set; }
        public string Name { get; set; }
        public string Description { get; set; }
        public string MapIcon { get; set; }
        public bool Deleted { get; set; }
        public DateTime UpdatedAt { get; set; }
        public DateTime CreatedAt { get; set; }
        public virtual ICollection Employees { get; set; }
    }
}
Add ConnectionString
Now, let’s add a new connectionstring in the appSettings.json file to be use for the database as followed.

Add the DbContext
Right-click on the Models folder and select Add > Class.
Enter ApplicationDbContext.cs as the name and click OK.
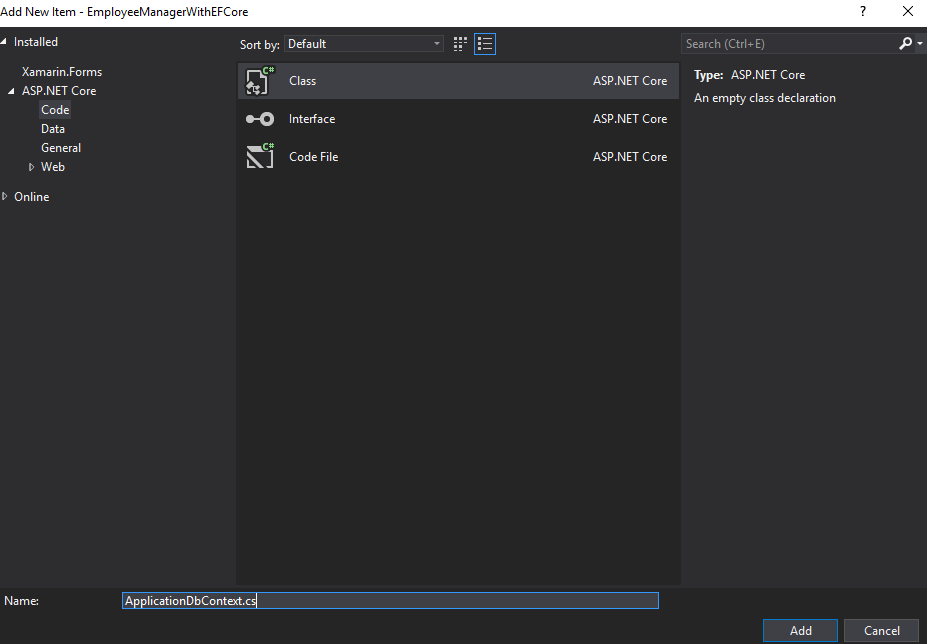
Replace the contents of the file with the following code:
using Microsoft.EntityFrameworkCore;

namespace EmployeeManagerWithEFCore.Models
{
    public class ApplicationDbContext : DbContext
    {
        public ApplicationDbContext(DbContextOptions options)
            : base(options)
        { }

        public DbSet Employees { get; set; }
        public DbSet Departments { get; set; }

    }
}
Some key notes about the above code snippet:
The class ApplicationDbContext is derived from DbContext which is a class that manages the database connection.
The DbSet properties are used to map with the database tables.
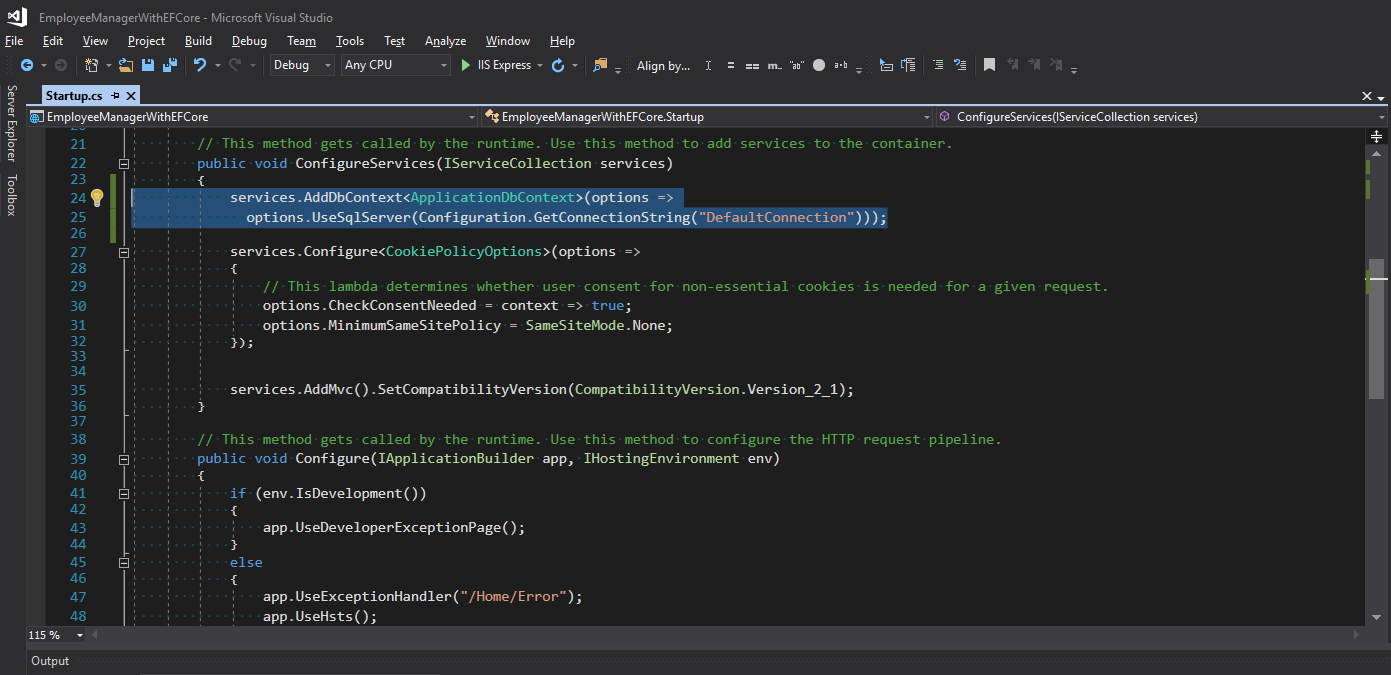
Register the db context
Now, we can register the context via the service configuration in the startup.cs file as shown below.
We have everything we need in the project to build it and make sure there’s no error. Once done, we can start creating the database.
Add Database
Tools > NuGet Package Manager > Package Manager Console
Run the following commands:
In order to generate the database and add the necessary tables, we need to run migration commands from the package manager console.
In Visual Studio select Tools > NuGet Package Manager > Package Manager Console.
Run the following commands:
 Add-Migration InitialDatabaseCreation
 Update-Database
In case you run into some error as I did during in this step, simply close Visual Studio and re-open the project. Then, re-run add-migration again.
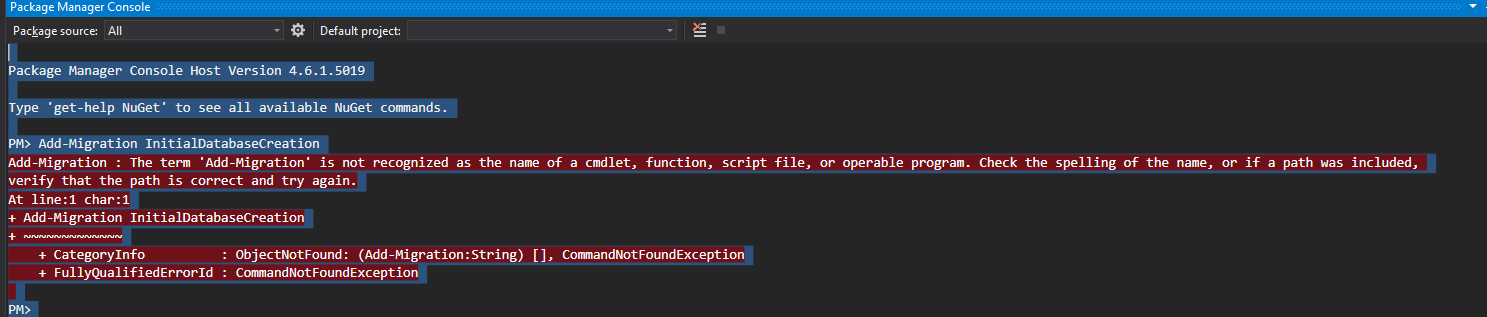
Voila, after closing and re-open Visual Studio, I was able to successfully run Migration as expected.
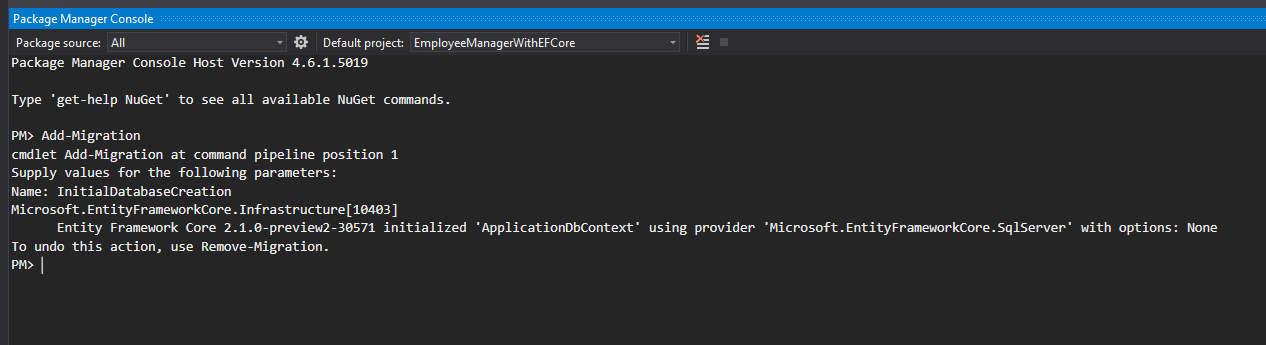
PM> Add-Migration
cmdlet Add-Migration at command pipeline position 1
Supply values for the following parameters:
Name: InitialDatabaseCreation
Microsoft.EntityFrameworkCore.Infrastructure[10403]
      Entity Framework Core 2.1.0-preview2-30571 initialized 'ApplicationDbContext' using provider 'Microsoft.EntityFrameworkCore.SqlServer' with options: None
To undo this action, use Remove-Migration.
PM> Update-Database
Microsoft.EntityFrameworkCore.Infrastructure[10403]
      Entity Framework Core 2.1.0-preview2-30571 initialized 'ApplicationDbContext' using provider 'Microsoft.EntityFrameworkCore.SqlServer' with options: None
Microsoft.EntityFrameworkCore.Database.Command[20101]
      Executed DbCommand (447ms) [Parameters=[], CommandType='Text', CommandTimeout='60']
      CREATE DATABASE [EmployeeManagerWithEFCoreDB];
Microsoft.EntityFrameworkCore.Database.Command[20101]
      Executed DbCommand (61ms) [Parameters=[], CommandType='Text', CommandTimeout='60']
      IF SERVERPROPERTY('EngineEdition') <> 5
      BEGIN
          ALTER DATABASE [EmployeeManagerWithEFCoreDB] SET READ_COMMITTED_SNAPSHOT ON;
      END;
Microsoft.EntityFrameworkCore.Database.Command[20101]
      Executed DbCommand (5ms) [Parameters=[], CommandType='Text', CommandTimeout='30']
      CREATE TABLE [__EFMigrationsHistory] (
          [MigrationId] nvarchar(150) NOT NULL,
          [ProductVersion] nvarchar(32) NOT NULL,
          CONSTRAINT [PK___EFMigrationsHistory] PRIMARY KEY ([MigrationId])
      );
Microsoft.EntityFrameworkCore.Database.Command[20101]
      Executed DbCommand (33ms) [Parameters=[], CommandType='Text', CommandTimeout='30']
      SELECT OBJECT_ID(N'[__EFMigrationsHistory]');
Microsoft.EntityFrameworkCore.Database.Command[20101]
      Executed DbCommand (1ms) [Parameters=[], CommandType='Text', CommandTimeout='30']
      SELECT [MigrationId], [ProductVersion]
      FROM [__EFMigrationsHistory]
      ORDER BY [MigrationId];
Microsoft.EntityFrameworkCore.Migrations[20402]
      Applying migration '20190114032255_InitialDatabaseCreation'.
Applying migration '20190114032255_InitialDatabaseCreation'.
Microsoft.EntityFrameworkCore.Database.Command[20101]
      Executed DbCommand (1ms) [Parameters=[], CommandType='Text', CommandTimeout='30']
      CREATE TABLE [Departments] (
          [Id] int NOT NULL IDENTITY,
          [Name] nvarchar(max) NULL,
          [Description] nvarchar(max) NULL,
          [MapIcon] nvarchar(max) NULL,
          [Deleted] bit NOT NULL,
          [UpdatedAt] datetime2 NOT NULL,
          [CreatedAt] datetime2 NOT NULL,
          CONSTRAINT [PK_Departments] PRIMARY KEY ([Id])
      );
Microsoft.EntityFrameworkCore.Database.Command[20101]
      Executed DbCommand (2ms) [Parameters=[], CommandType='Text', CommandTimeout='30']
      CREATE TABLE [Employees] (
          [Id] int NOT NULL IDENTITY,
          [FirstName] nvarchar(60) NOT NULL,
          [LastName] nvarchar(60) NULL,
          [Salary] int NOT NULL,
          [Title] nvarchar(20) NOT NULL,
          [DepartmentId] int NULL,
          CONSTRAINT [PK_Employees] PRIMARY KEY ([Id]),
          CONSTRAINT [FK_Employees_Departments_DepartmentId] FOREIGN KEY ([DepartmentId]) REFERENCES [Departments] ([Id]) ON DELETE NO ACTION
      );
Microsoft.EntityFrameworkCore.Database.Command[20101]
      Executed DbCommand (0ms) [Parameters=[], CommandType='Text', CommandTimeout='30']
      CREATE INDEX [IX_Employees_DepartmentId] ON [Employees] ([DepartmentId]);
Microsoft.EntityFrameworkCore.Database.Command[20101]
      Executed DbCommand (2ms) [Parameters=[], CommandType='Text', CommandTimeout='30']
      INSERT INTO [__EFMigrationsHistory] ([MigrationId], [ProductVersion])
      VALUES (N'20190114032255_InitialDatabaseCreation', N'2.1.0-preview2-30571');
Done.
PM>
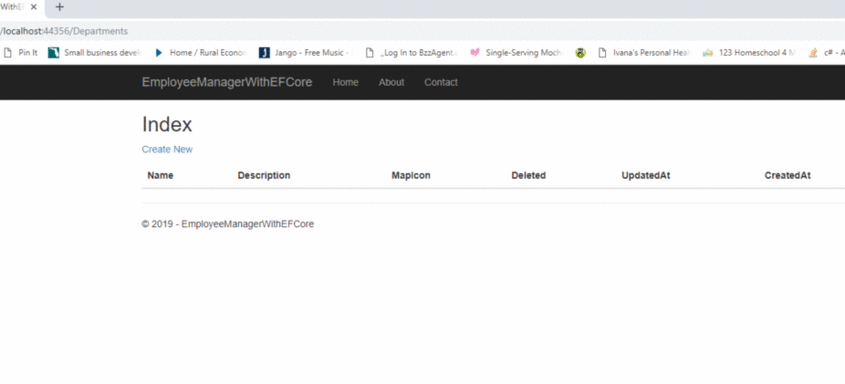
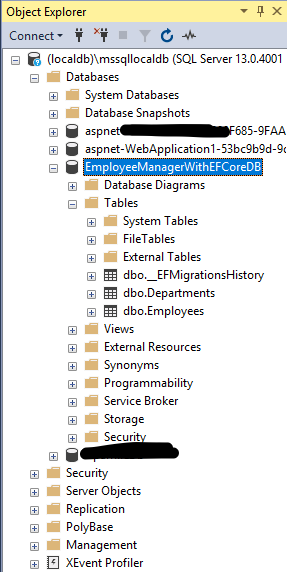
To conclude, if you check in sql server management and load your local databases, we should be seeing the new database created.
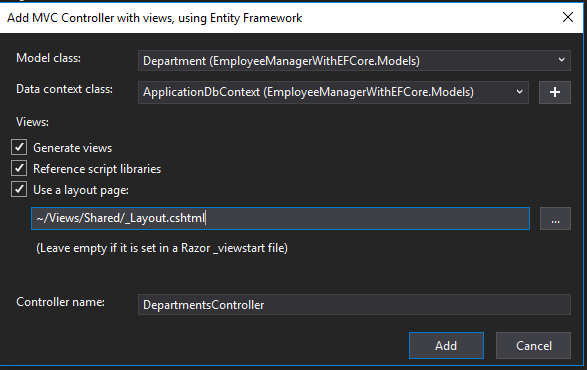
Add Department and Employee controller as shown below.
Controller.Select MVC Controller with views, using Entity Framework and click Add.
Set Model class to respective to the controller being created and Data context class to ApplicationDbContext.
Make sure to select the “_Layout.cshtml”
Click Add.
Once those controllers are created you should notice two files “DepartmentsController.cs”,”EmployeesController.cs” in the controller folder and the view folder for each of those controllers with with the necessary view pages with (.cshtml).
Let’s run the application and see what we get and start populating the database.
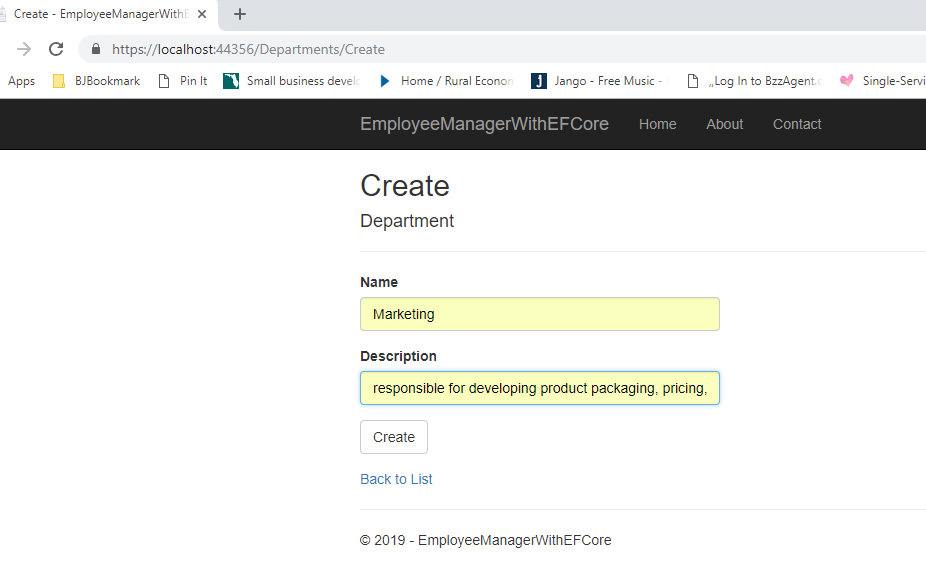
Example of the department creation page:
For simplicity, I have hard-coded the department to get the employees added to the department we have created. For production, you might want to add a dropdown list for user to select the department while creating the employee.